ScratchMaker · Assay Plates & Light Masks

Scratch Assay Plates
More Physiologically Relevant Than Inserts

ScratchMaker scratch assay plates feature photosensitizer-coated glass bottoms for standardized, reproducible wound healing assays. Available in 6-, 24-, and 96-well format. Requires a fluorescence microscope as light source – at a distance of 3 cm between light and plate. No washing step required.

6-Well-Platte
24-Well-Platte
96-Well-Platte
View Products & Pricing Angebot anfordern
The Science

Why these scratch assay plates produce better data than insert models

The method you use to create a wound determines what biology you can study. Not all scratch assay plates are equal – the wound type matters. Studies on cell migration assays consistently show that physiological relevance is the critical differentiator between insert-based and photochemical wound models.

Physiological wound healing with photochemical cell death – ScratchMaker scratch assay plates
ScratchMaker Photochemical Method

Real cell death – real wound healing

Electromagnetic radiation (IR/VIS range) activates photosensitizer coating → singlet oxygen → true localized cell death
Migrating cells must clear dead cell bodies – exactly as in vivo wound healing
Closely mimics the physiological situation at the cellular and biological level
No insert – no detachment risk, no floating debris in medium
Defined wound geometry, reproducible across all wells and experiments
Ibidi culture insert coverslips in 24-well plate – insert-based scratch assay method
Insert Method (e.g. Ibidi)

A gap – not a wound

Cells are physically excluded during seeding – no actual cell death occurs
Migrating cells close a clean gap with no cell debris to clear
Does not mimic physiological wound healing in vivo
Inserts can detach after 2+ hours – cells float freely in medium
€50–80 per plate, single-use, no partial well use
The Third Option

Manual pipette wounding – the most common, least controlled method

Most labs still create scratch wounds by dragging a pipette tip across the monolayer by hand. This mechanically ruptures cells at the wound edge – width, angle, and depth vary with every pass, every operator, every plate. ScratchMaker scratch assay plates replace this manual step entirely with a precisely defined, reproducible photochemical wound.

Manual pipette wounding of cell monolayer – uncontrolled scratch assay method compared to ScratchMaker scratch assay plates

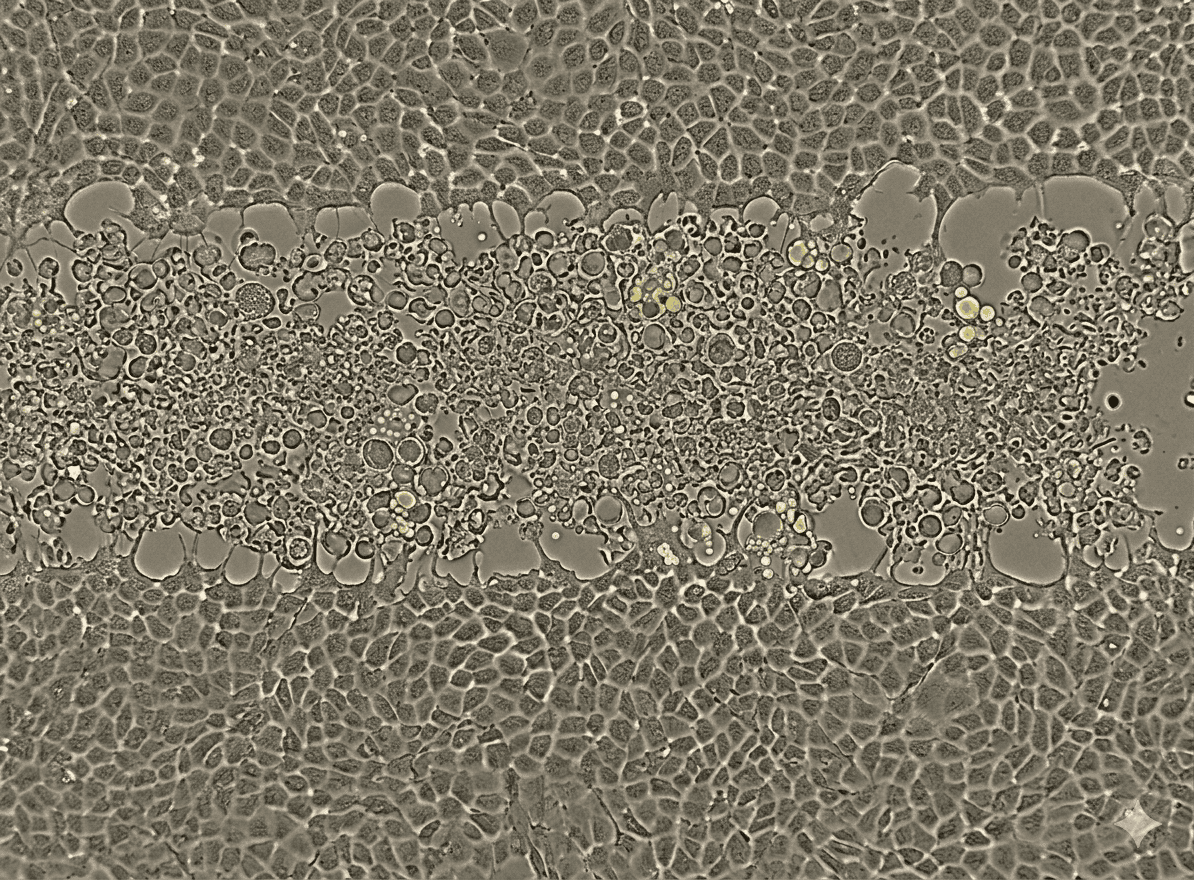
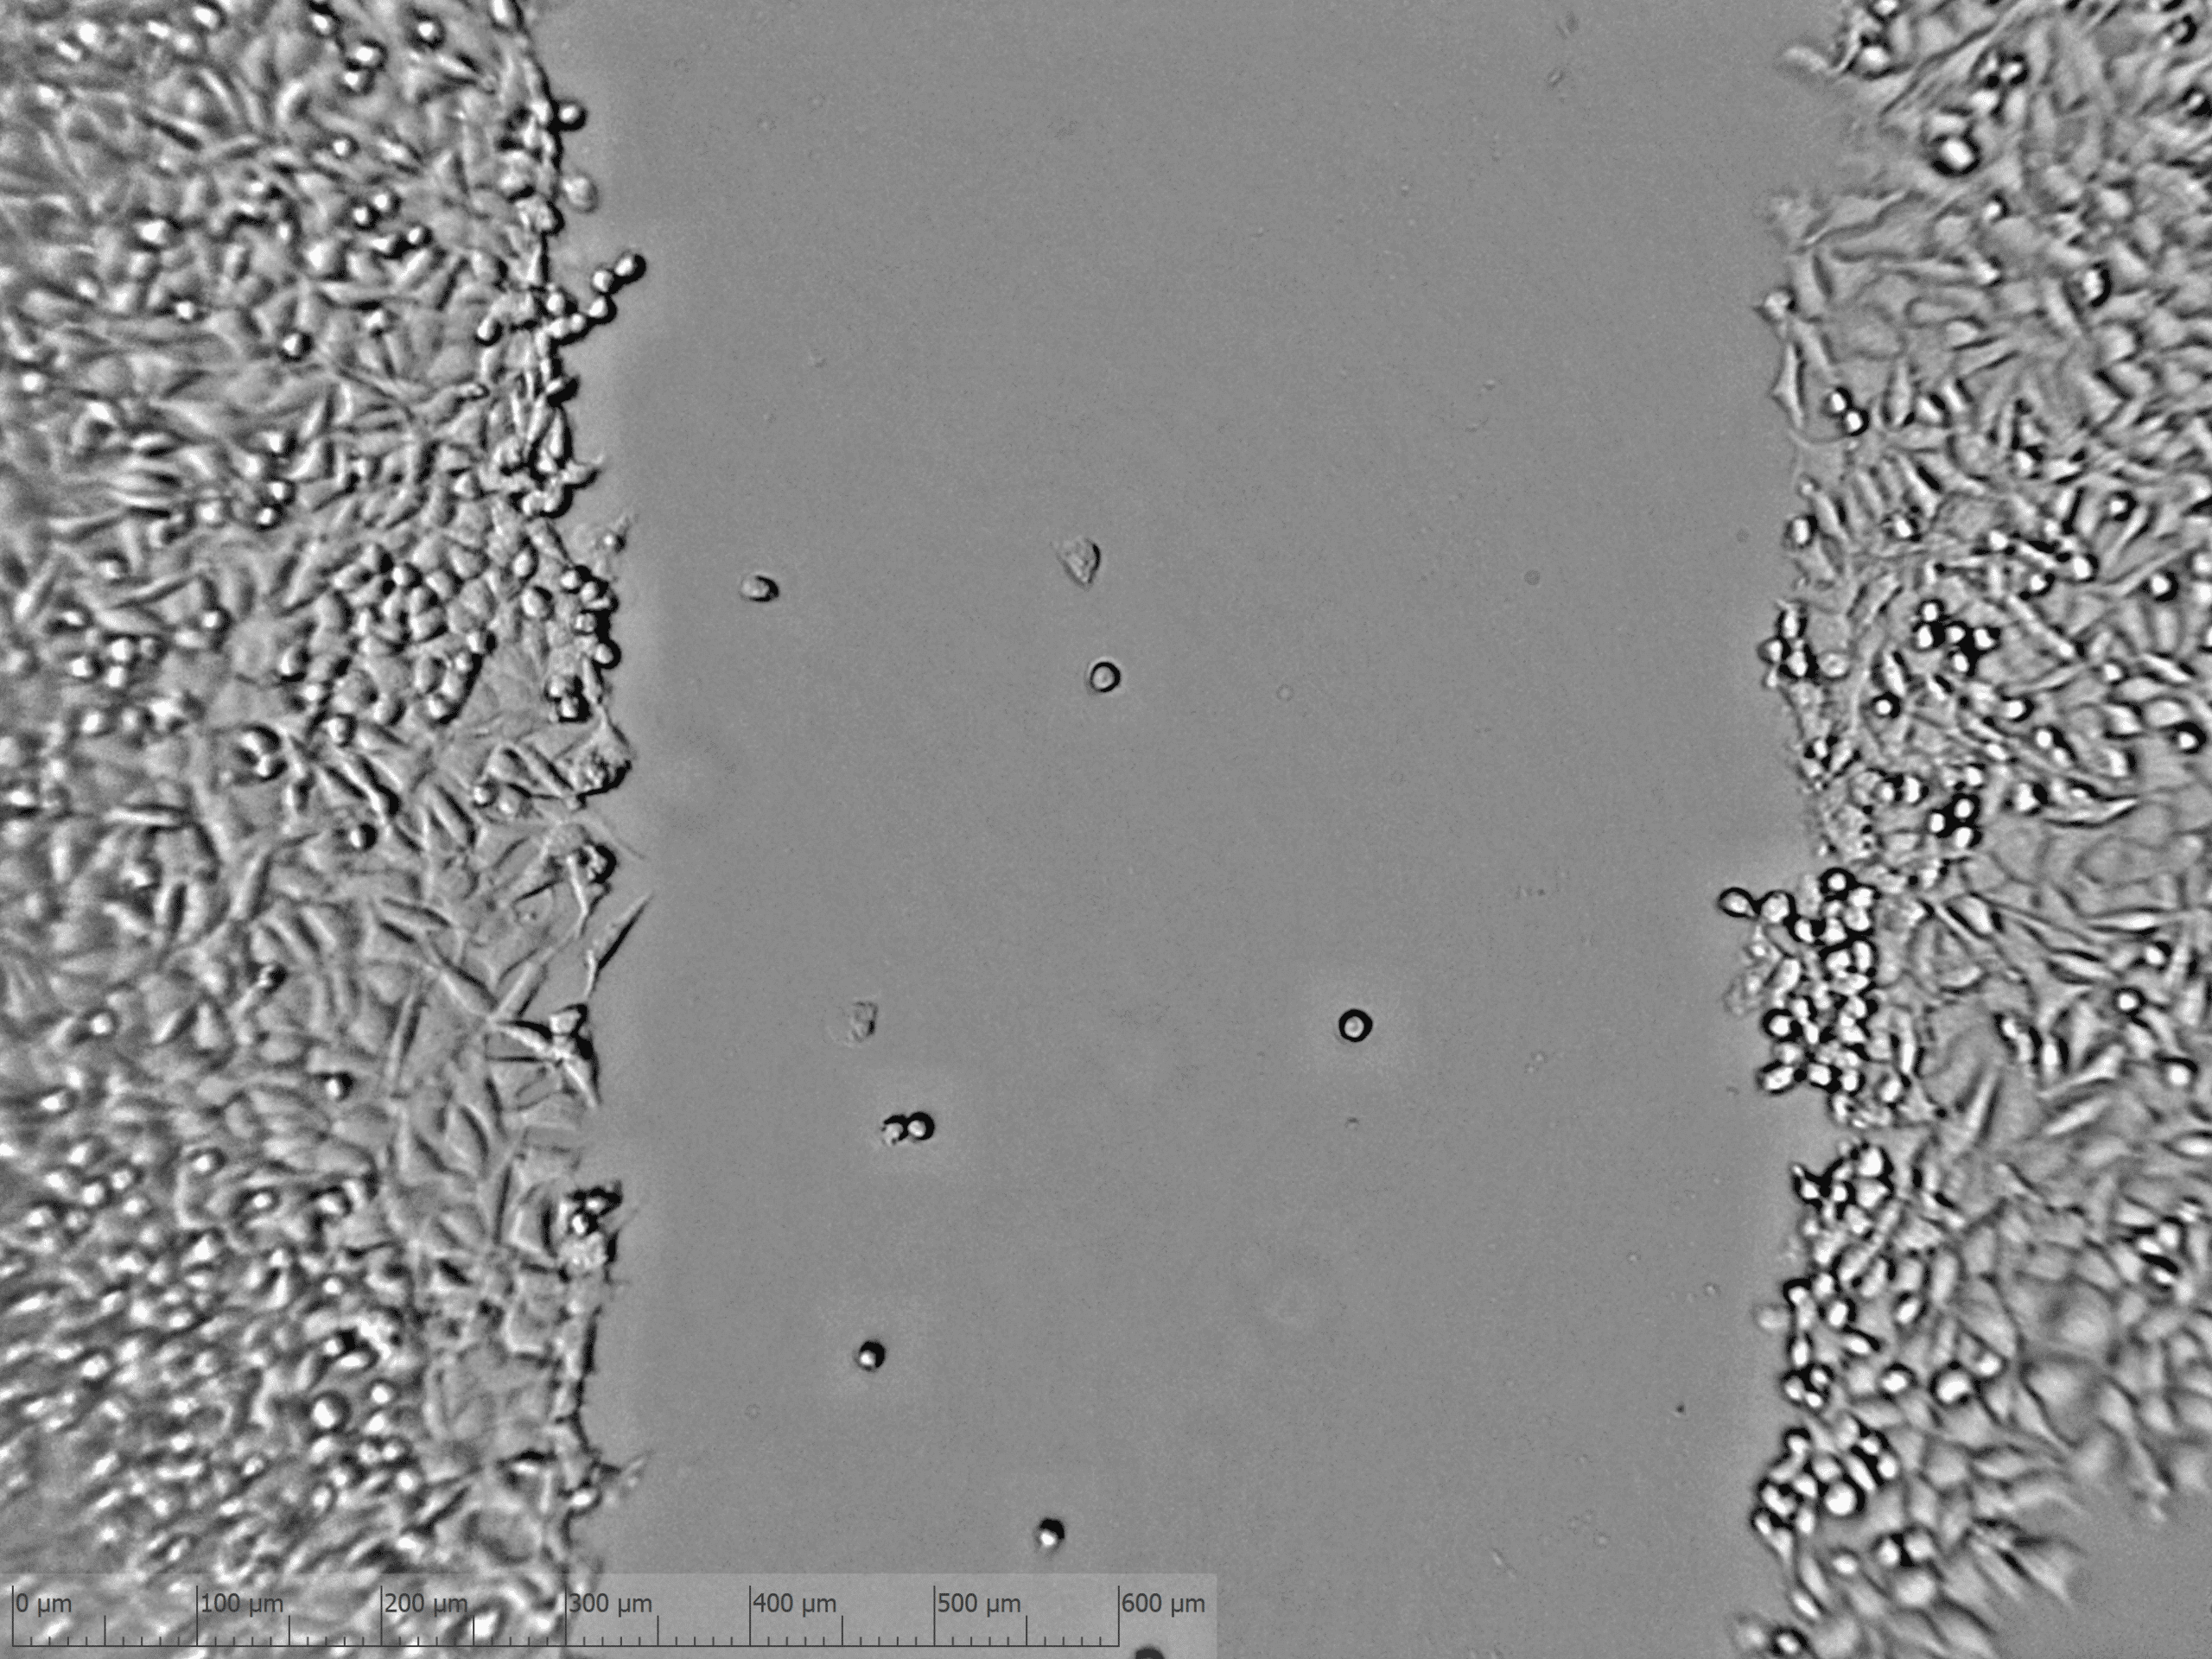
"The cells, when they move towards the wound, they not only close the wound, but also digest the cell bodies which are on the way. So we believe that this closely mimics the physiological situation, the real-time situation, what's happening at a biological level."

— Researcher feedback, zenCELL owl live demo · June 2026
Why Standardize?

The problem with manual pipette scratches – why standard scratch assay plates matter

Around 12,000 PubMed entries involve scratch assays – most performed manually with pipette tips. Inter-assay variability is the most cited limitation in wound healing assay publications.

±30–60% Width Variance

Manual pipette scratches vary significantly depending on operator pressure, angle, and tip size – making quantification unreliable.

Not Reproducible

Results cannot be directly compared between experiments, time points, or operators – destroying statistical power.

Reviewer Criticism

Lack of standardization is a frequent reason for rejection in peer review of migration and wound healing studies.

96-Well Not Scalable

96 manual scratches per plate is time-consuming and error-prone – high-throughput screening is not realistic.

Mechanical Cell Rupture

The pipette tip physically tears cells at the wound edge, generating uncontrolled debris and stress responses that confound migration readouts.

Operator & Timing Drift

Each well is scratched at a slightly different moment and with a slightly different hand motion – timing and technique drift accumulate across a plate.

Products & Pricing

ScratchMaker Scratch Assay Plates – 6-, 24-, and 96-Well Format

Our scratch assay plates feature photosensitizer-coated glass bottoms as single-use consumables, combined with reusable precision light masks. Requires a fluorescence microscope as minimum light source.

6-Well-Platte Small-scale · Qualitative analysis

Ideal for initial experiments, cell line screening, and qualitative migration studies with larger well volumes.

from €59 / plate · Light Mask €200
24-Well-Platte Most-used format · Recommended
Most Popular

The standard for scratch assay plates. Optimal for quantitative migration studies, drug testing, and compound screening.

from €59 / plate · Light Mask €200
96-Well-Platte High-throughput · HTS-ready

For screening studies with many conditions simultaneously. Maximum throughput with consistent reproducibility across all wells.

from €69 / plate · Light Mask €200
Request Your Quote

Get your non-binding offer for ScratchMaker scratch assay plates

Just tell us which scratch assay plate format you need – 6-, 24-, or 96-well – and how many plates. We typically supply ScratchMaker scratch assay plates packed in trays of 5 or 10 plates, so your order can be sized exactly to your experimental plan.

Request Your Non-Binding Offer

No commitment · Response within 1–2 business days

ScratchMaker scratch assay plate with photosensitizer-coated glass bottom – 6-well format for wound healing assay
Core Product
Single-use · Sterile · Individually packaged

ScratchMaker Assay Plate

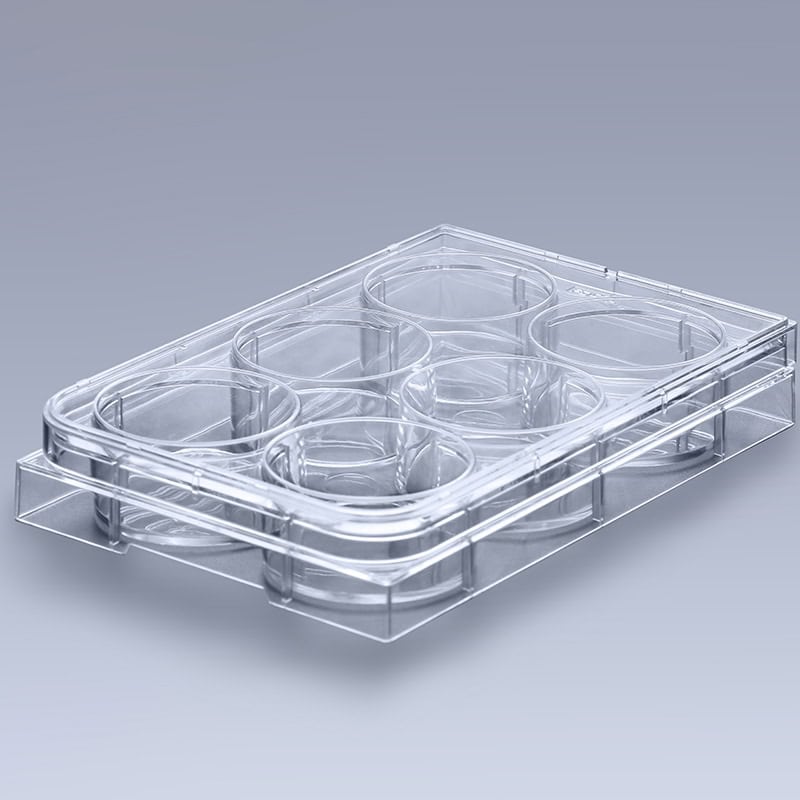
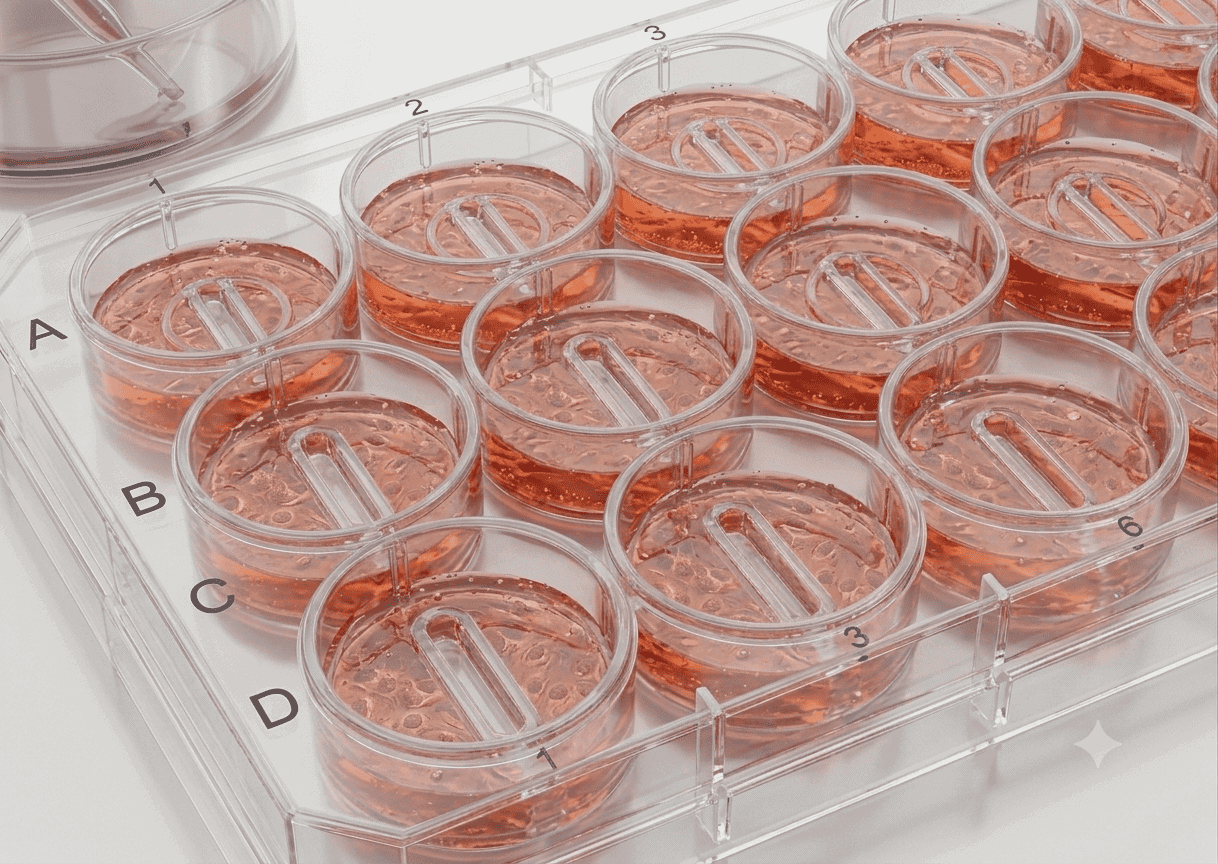
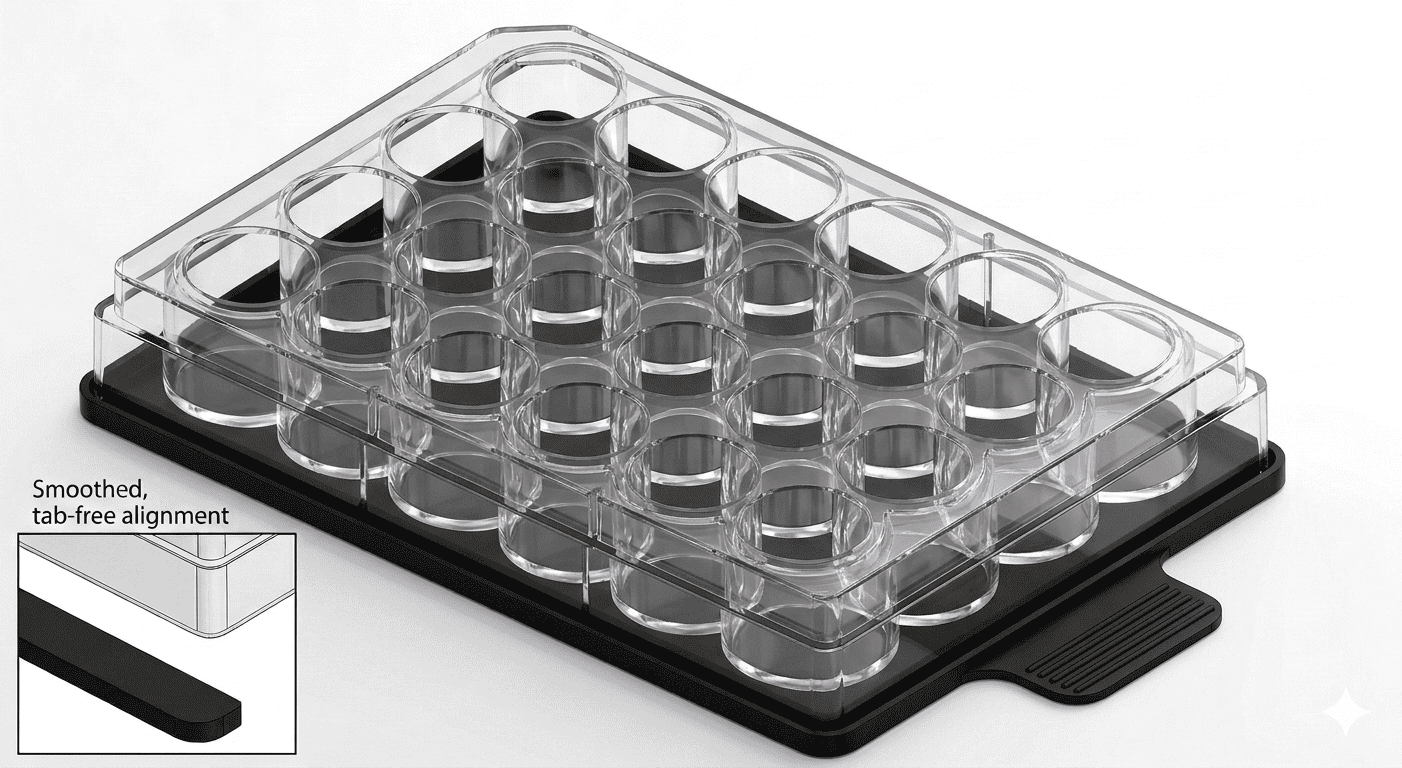
Standard well plate with individually bonded, photosensitizer-coated glass bottoms. Optimized for clean, reproducible photochemical wound edges in scratch assay applications.

Formats6-Well / 24-Well / 96-Well
BottomPhotosensitizer-coated glass
CompatibilityFluorescence microscope (minimum requirement)
Partial useYes – expose wells step by step (sterile)
Washing stepNot required after exposure
6-Well-Plattefrom €59
24-Well-Plattefrom €59
96-Well-Plattefrom €69
Volume pricing (packs)Auf Anfrage
Get Your Offer
ScratchMaker light mask for scratch assay plates – 24-well format, clips under plate for IR/VIS light exposure
Reusable · One-time investment

ScratchMaker Light Mask

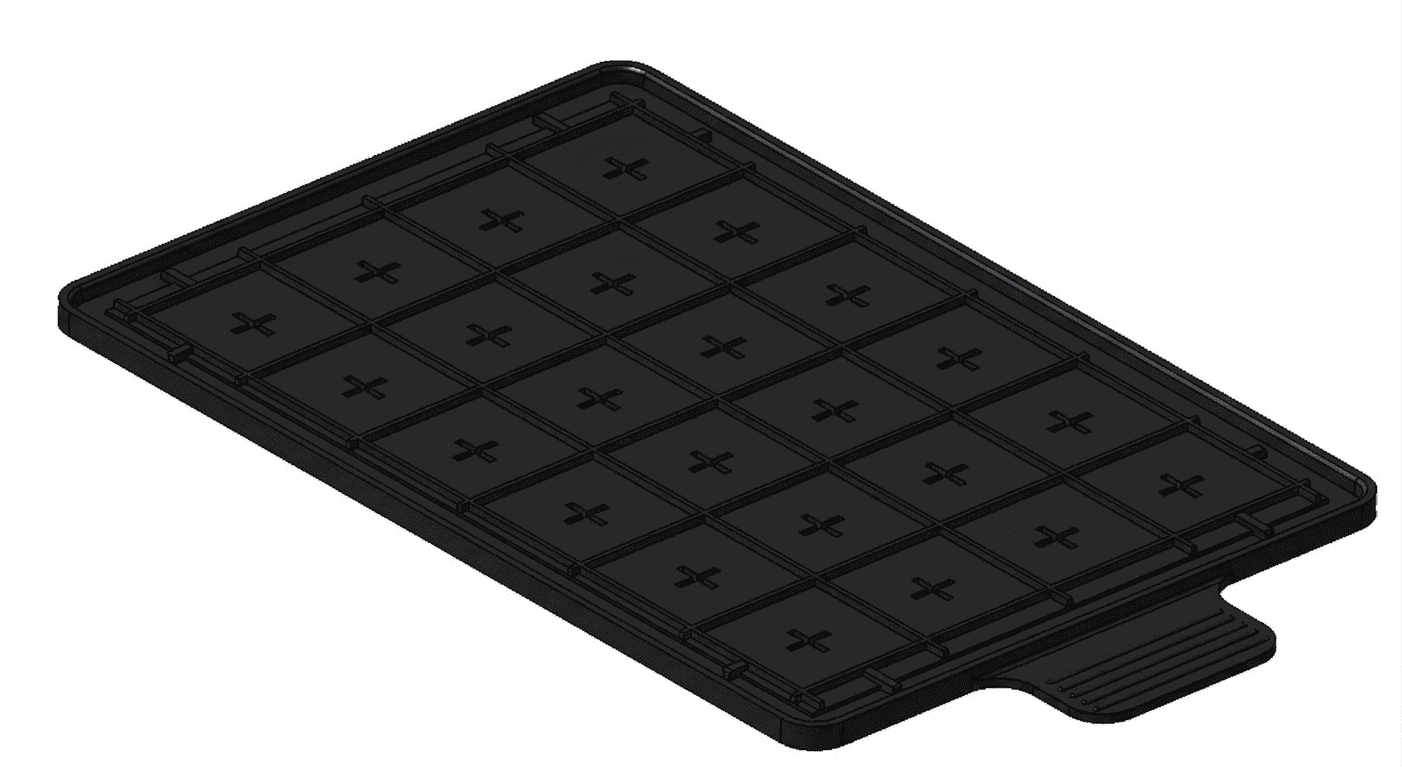
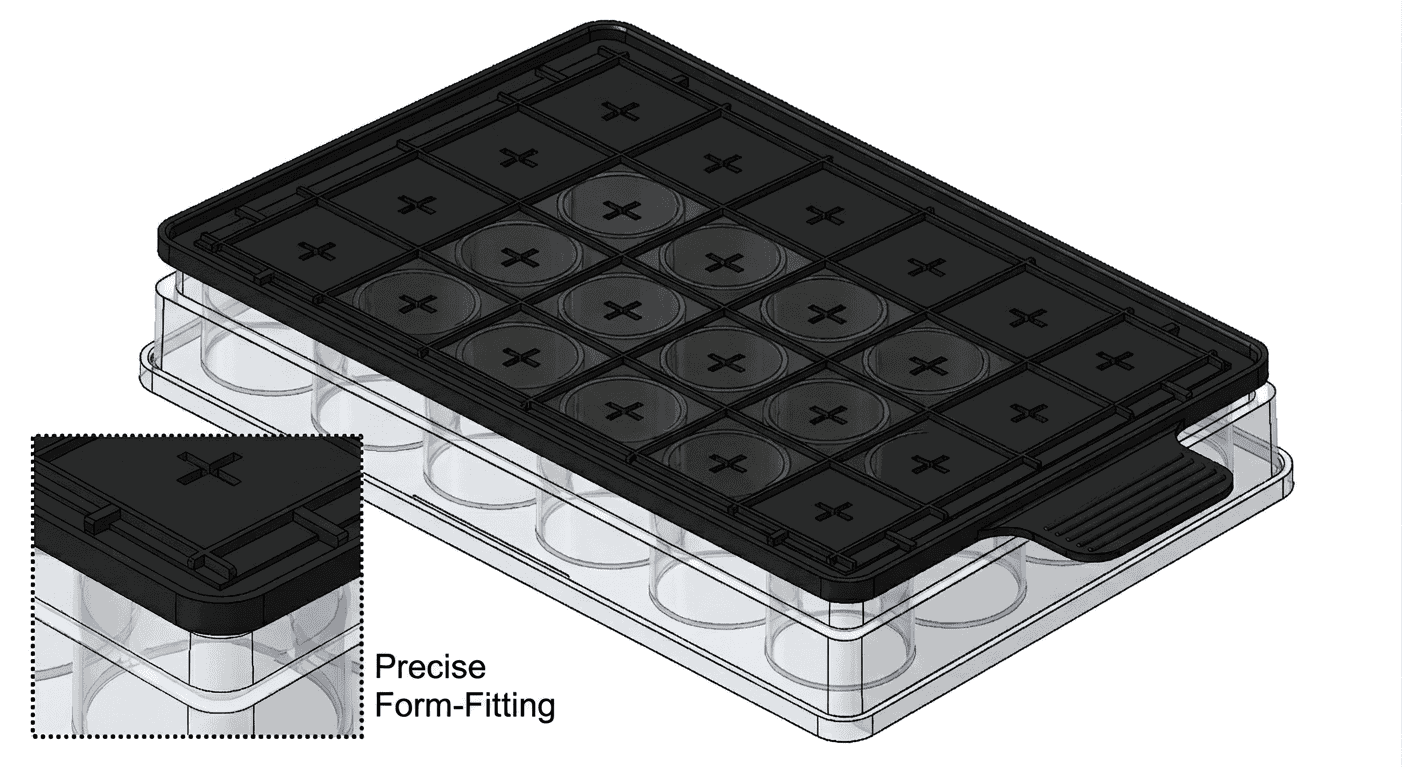
Precision-manufactured light mask that clips directly under the well plate. Defines the IR/VIS light exposure area precisely – identical position in every well, every experiment. Reusable across many experiments.

Formats6-Well / 24-Well / 96-Well
MountingClips under plate – no alignment needed
MaterialMedical-grade polymer
Sterilization70% EtOH / Autoclave
ReusableYes – multiple experiments
Light mask (6-Well)€200
Light mask (24-Well)€200
Light mask (96-Well)€200
Reusable – one-time investment, no recurring cost
Get Your Offer
ScratchMaker starter kit – light mask with scratch assay plate, top view, 24-well format ScratchMaker starter kit – light mask with scratch assay plate, bottom view, 24-well format
Recommended · Start immediately

ScratchMaker Starter Kit

Everything you need for your first reproducible scratch assay. Light mask + scratch assay plates in one box, protocol PDF included. Start today, no setup required.

ContentsLight mask + 5 plates
Format24-Well (standard) or 6-Well
Protocol PDFIncluded
Setup requiredNone – ready to use
Starter Kit 24-Well (mask + 5 plates)€459
Starter Kit 96-Well (mask + 5 plates)€519
VolumenpreiseAuf Anfrage
Get Your Offer
Flexible plate usage – use wells step by step

You do not need to expose all wells at once. Use only the wells your current experiment requires – expose them one by one, step by step. As long as you work under sterile conditions, the remaining wells stay intact and can be used in subsequent experiments. This makes each scratch assay plate a cost-efficient resource across multiple independent assays.

Your Setup Today

Already working with ScratchMaker? Here's what to add next

Most labs start with the scratch assay plates alone and grow into the full ScratchMaker workflow step by step. Find out where you stand – and what the next step typically looks like.

Step 1

Using ScratchMaker plates with your fluorescence microscope

You're generating reproducible, photochemical scratch assay wounds – manually imaging each plate under your fluorescence microscope.

→ Next: automate imaging with zenCELL owl
Step 2

Already observing wound closure with zenCELL owl?

Your ScratchMaker plate sits inside the zenCELL owl, capturing every well automatically over 24–72 h – no manual imaging needed.

→ Next: automate the analysis itself
Step 3

Want a custom wound closure algorithm?

Standard quantification not enough? We can build a custom analysis algorithm tailored to your cell type, wound geometry, or readout – tell us about your project.

→ Get in touch about a custom algorithm
Step-by-Step Protocol

How to run a scratch assay with ScratchMaker plates

From confluent monolayer to defined photochemical wound – a standardized workflow in four steps. ScratchMaker scratch assay plates are compatible with 6-, 24-, and 96-well formats.

1
Seed Cells & Reach Confluency

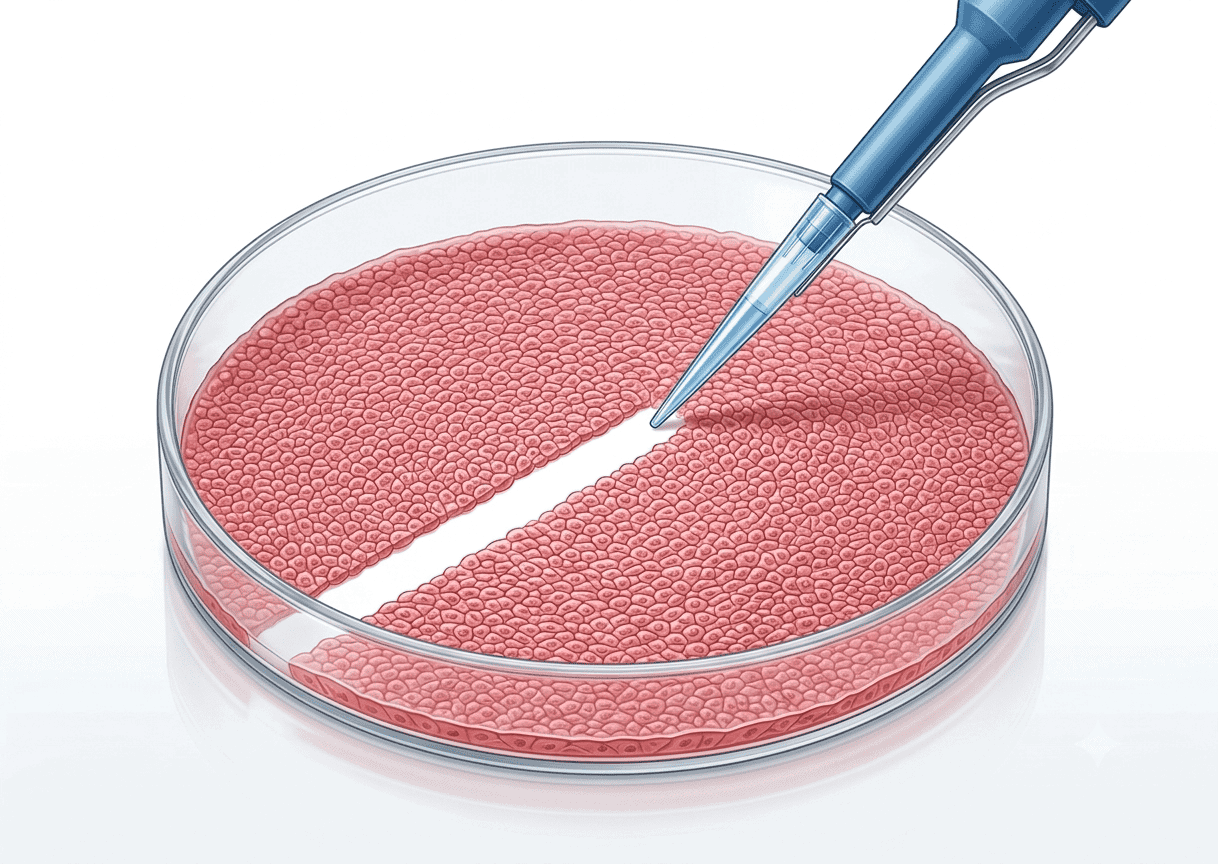
Seed your cells onto the ScratchMaker scratch assay plate at the appropriate density. Incubate until ≥95% confluency is reached – typically 16–24 h depending on cell line.

Note: The photosensitizer coating is already embedded in the glass bottom – no additional preparation or coating needed.
2
Clip the Light Mask Under the Plate

Clip the ScratchMaker light mask onto the underside of the well plate. The mask acts as holder and light guide – it defines exactly which area of each well will be exposed.

Key point: The mask clips securely beneath the plate. Position is fixed and identical across all wells – defining the exact exposure area for every single well.

Place each well under your fluorescence microscope light source for 60 seconds at a distance of 3 cm between light and plate. The light activates the photosensitizer → singlet oxygen → localized cell death in the defined zone. Work well by well through the plate.

Result: A precisely defined wound with dead cell bodies in place – exactly as in physiological wound healing. No mechanical damage, no scratching instrument required.

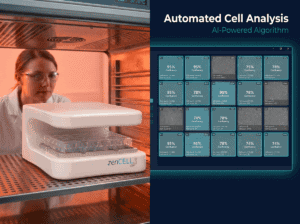
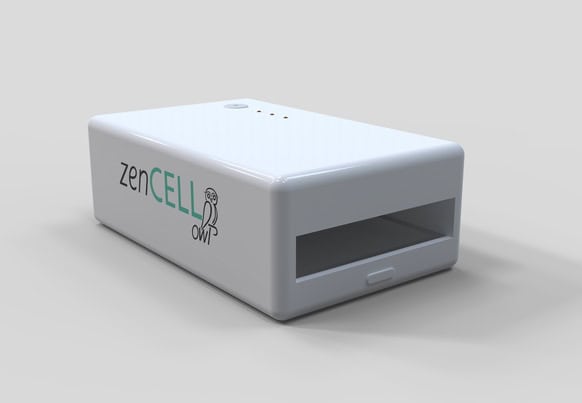
The scratch assay plate is ready immediately after light exposure. No washing step required. Place directly under your microscope or into the zenCELL owl and start live-cell monitoring.

zenCELL owl: Set up continuous time-lapse imaging over 24–72 h. Wound closure is quantified automatically – no manual intervention needed.
Real result – captured with zenCELL owl at T=0
Image of scratch assay wound at T=0 captured with zenCELL owl – clean wound edges with defined geometry using ScratchMaker scratch assay plates
Scratch assay wound at T=0 – clean edges, defined geometry, cell debris visible

Works with 6-Well, 24-Well, and 96-Well ScratchMaker scratch assay plates. The same light mask system applies to all formats – clip on, expose, start imaging.

60 sec
Exposure per well
0
Washing steps
4
Steps total
Alternative

ScratchMaker Scratch Assay Plates vs. Pipette vs. Ibidi Inserts

A direct comparison across the three most common wound healing assay approaches – and why photochemical scratch assay plates produce the most physiologically relevant data.

MerkmalScratchMaker PlatesPipettenspitzeIbidi Einsatz
Wound typePhotochemical cell deathMechanical ruptureGap – no cell death
Physiological relevanceHigh – mimics in vivoModerateLow – no debris clearance
Cell debris clearanceYes, defined zoneYes, uncontrolledNo
Insert detachment riskNo insertNo insertYes – after 2+ hours
Scratch reproducibilityHochLow (±30–60%)Hoch
6-Well-PlatteJaJaJa
24-Well-PlatteJaJaJa
96-Well-PlatteJaLaboriousJa
Microscope requirementFluorescence microscope (min.) · 3 cm distanceAnyAny
Partial plate useYes – expose wells step by step (sterile)JaNo
Washing after woundNicht erforderlichRequiredRequired
Cost per platefrom €59~€0€50–80
Microelectrode Array (MEA)CompatibleAlternative methodAlternative method
Publication suitabilityJaLimitedJa
Additional Advantage

Compatible with Microelectrode Array (MEA) systems

ScratchMaker plates are compatible with Microelectrode Array (MEA) technology, offering a precise alternative to insert-based or manual scratch methods for electrical migration measurements. Because the wound position is precisely defined by the light mask, the MEA electrode is always located at the same position relative to the wound – making electrical migration measurements significantly more reproducible and valid.

Take It Further

Use your scratch assay plates with live-time wound closure monitoring – automatically, inside your incubator

ScratchMaker scratch assay plates are designed to work directly with the zenCELL owl incubator imager. Place the plate inside, press start – the system captures every well, every hour, automatically.

  • Continuous live-time imaging – every well, every time point, unattended
  • Scratch position fits exactly over zenCELL owl camera modules – no repositioning needed
  • Automated wound closure analysis with AI software – wound area quantified per time point
  • Full time-lapse export – 24 h, 48 h, 72 h migration movies ready for publication
  • All formats compatible – 6-, 24-, and 96-well scratch assay plates in the same system
Learn more about zenCELL owl
24
Channels imaged simultaneously
72 h
Continuous monitoring, hands-free
15×
More affordable than Incucyte S3
In Development

ScratchMaker Device – Fully Automated

Fully automated photochemical wound generation for our scratch assay plates – 96 identical wounds in under 60 seconds. Currently in prototype development.

ScratchMaker device prototype – fully automated photochemical wound generation for scratch assay plates
Coming Soon

ScratchMaker Device

Illuminate all wells simultaneously in one step using infrared or visible range illumination. Compatible with all ScratchMaker scratch assay plates – 24-well and 96-well. Early access on request.

Early Access
FAQ

Frequently asked questions about ScratchMaker scratch assay plates

Answers to the most common questions about light sources, wound geometry, plate usage, and compatibility.

What light source do I need to activate ScratchMaker scratch assay plates?
You need a fluorescence microscope as a minimum requirement – this is the light source used to activate the photosensitizer coating. Position the light source at a distance of 3 cm between light and plate, and expose each well for 60 seconds. No UV lamp, laser, or additional hardware is required.
How big is the wound created on ScratchMaker scratch assay plates?
The wound size and geometry are defined by the ScratchMaker light mask, which clips under the plate and is identical across all wells of a given format (6-, 24-, or 96-well). This gives you a precisely defined, reproducible wound area in every well – unlike manual pipette scratches, where width varies by ±30–60%.
Will ScratchMaker scratch assay plates work with my cell line?
ScratchMaker scratch assay plates are designed to work with adherent cell lines commonly used in wound healing and migration assays. As with any scratch assay, cells should reach ≥95% confluency before exposure. If you're unsure whether your specific cell line is suitable, get in touch and we're happy to discuss your application.
Can I use only some wells of a ScratchMaker plate, and use the rest later?
Yes. ScratchMaker scratch assay plates allow partial use – you can expose and use individual wells step by step, as long as you work under sterile conditions. Unused wells remain intact and can be used in a later, independent experiment, making each plate a cost-efficient resource across multiple assays.
Is the ScratchMaker light mask compatible with all plate formats?
The light mask is available for 6-, 24-, and 96-well formats and is matched to the corresponding ScratchMaker scratch assay plate. Each light mask is reusable (70% EtOH or autoclave sterilization) and represents a one-time investment – it works with all ScratchMaker plates of that format.
Do I need to wash the plate after creating the wound?
No. ScratchMaker scratch assay plates require no washing step after light exposure. The plate is ready for imaging immediately – place it directly under your microscope or into the zenCELL owl to start live-cell monitoring.
Are ScratchMaker scratch assay plates compatible with Microelectrode Array (MEA) systems?
Yes. Because the wound position is precisely defined by the light mask, the MEA electrode is always located at the same position relative to the wound. This makes ScratchMaker scratch assay plates a precise alternative to insert-based or manual scratch methods for electrical migration measurements.
Do I need a zenCELL owl to use ScratchMaker scratch assay plates?
No – ScratchMaker scratch assay plates and light masks work independently with any fluorescence microscope. The zenCELL owl is an optional addition that automates imaging and wound closure analysis over 24–72 h, but it is not required to run a scratch assay with ScratchMaker plates.
How is wound closure quantified?
Wound closure can be calculated manually from images taken at defined time points using the formula: Wound Closure (%) = (Initial wound area − Current wound area) / Initial wound area × 100. When using the zenCELL owl, this calculation is performed automatically by the AI software for every well and time point.

Ready to standardize your scratch assay plates?

Price list, protocol PDF, and sample order for ScratchMaker scratch assay plates – contact us directly.

Contact Us
zenCELL owl im Einsatz

Sehen Sie zenCELL Eule
Live – 30 Min.
- Kostenlos -

Echte Zellen. Echte Daten. Zellzählung mittels KI,
XYZ-Phase & komplette Software – live im Inkubator. Zweimal pro Woche über MS Teams.

Buchen Sie Ihre kostenlose Remote-Demo

Sehen Sie sich das Live-Bild der zenCELL-Eule im Brutkasten an. Verfügbar.

Fordern Sie Ihren Demo-Slot an
z. B. Konfluenzüberwachung, Scratch-Assay, Sphäroide...