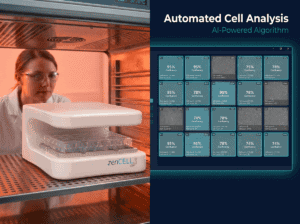
Live Cell Imaging · Time-Lapse Microscopy · Environmental Control
Live Cell Imaging — Complete Guide: Methods, Equipment & Best Practices
Live cell imaging allows researchers to observe and record the behavior of living cells in real time — capturing migration, division, morphology changes, and drug responses that fixed-cell methods cannot reveal. This guide covers the fundamentals, equipment requirements, phototoxicity management, and how to choose the right system for your assay.
Live cell imaging is any microscopy technique that images living cells over time under physiological conditions. It requires stable temperature (37°C), 5% CO₂, and humidity control throughout the experiment. The main methods are brightfield/phase contrast (label-free, minimal phototoxicity) and fluorescence (labelled cells, higher phototoxicity risk). In-incubator systems eliminate environmental fluctuations by placing the imaging system inside the existing CO₂ incubator.
What Is Live Cell Imaging?
Live cell imaging captures dynamic cellular processes that are invisible in fixed-cell experiments: cell migration, wound closure, spheroid growth, cytotoxicity onset, confluency kinetics, and real-time drug responses. For most experimental setups, live cell imaging is the most accurate and convenient way to monitor gap closure in wound healing assays — and the same principle applies across all time-dependent biological processes.
The fundamental challenge of live cell imaging is maintaining physiological conditions throughout the experiment. Cells are sensitive to temperature changes, CO₂ fluctuations, humidity loss, and phototoxic damage from illumination — and any of these perturbations alters cell behavior and compromises data quality.
Live Cell Imaging Methods
Brightfield and Phase Contrast
Brightfield and phase contrast imaging use transmitted white light to visualize cell morphology without labelling. They are the preferred methods for label-free assays including wound healing, confluency monitoring, cytotoxicity, and spheroid growth. Phototoxicity is minimal — transmitted white light at low intensity does not significantly damage cells even during multi-day experiments.
Best for: wound healing assay, scratch assay, confluency monitoring, cytotoxicity, spheroid growth monitoring, any assay where cell morphology is the readout.
Fluorescence Live Cell Imaging
Fluorescence imaging uses labelled cells — genetically encoded fluorescent proteins (GFP, RFP) or chemical fluorescent dyes — to visualize specific cellular structures or report biochemical events. It provides molecular specificity that brightfield cannot offer, but introduces phototoxicity risk from high-intensity illumination and photobleaching of fluorescent probes.
Best for: protein localization, signaling reporters, labeled migration tracking, multi-channel co-localization studies.
Time-Lapse Microscopy
Time-lapse microscopy held the largest share in the live cell imaging market in 2025, owing to its ability to capture dynamic cellular processes in real time with high precision. Images are captured at defined intervals — typically every 1–60 minutes depending on the speed of the biological process — and assembled into a time series for quantitative analysis.
Key parameter: Imaging frequency is a balance between temporal resolution and phototoxicity. For wound healing assays, 5–30 minute intervals are typically sufficient. For fast processes like mitosis, intervals as short as 1 minute may be needed.
Environmental Control — The Critical Factor
Environmental control is the most frequently underestimated variable in live cell imaging. Every time a cell culture plate is removed from the incubator for imaging, it experiences:
- Temperature drop — even brief exposure to room temperature (20–22°C) alters cytoskeletal dynamics and migration speed within minutes
- CO₂ loss — medium pH shifts upward within seconds outside the incubator, affecting receptor signaling
- Humidity reduction — evaporation concentrates media, altering osmolarity
- Mechanical disturbance — transport vibration can dislodge weakly adherent cells
These perturbations are not trivial. A study by Nikon Instruments showed that temperature recovery after a 30-second incubator door opening takes 10–15 minutes — during which cell behavior is measurably altered.
Two Approaches to Environmental Control
| 标准 | In-Incubator Imaging (zenCELL owl) | Stage Top Incubator |
|---|---|---|
| Environmental stability | Perfect — incubator conditions maintained throughout | Good — local control, disrupted on opening |
| Cell transport required | No — cells never leave incubator | Yes — contamination and disturbance risk |
| CO₂ control | Full incubator CO₂ — 5% constant | Local chamber — requires optimization |
| Parallel wells | 24 simultaneously | 1 position at a time |
| Setup complexity | Plug & Play | Complex calibration required |
| 费用 | From €290/month | €12,000–25,000+ |
Phototoxicity — How to Minimize It
Phototoxicity is cell damage caused by light exposure during imaging. It is the primary concern in fluorescence live cell imaging, where high-energy photons excite fluorophores and generate reactive oxygen species (ROS) that damage DNA, lipids, and proteins. Manifestations include altered cell morphology, reduced migration speed, mitotic arrest, and cell death.
Key warning: Phototoxic effects are often subtle and not immediately visible. Cells may appear morphologically normal while their migration speed is significantly reduced — compromising quantitative results without obvious artifact.
Practical Phototoxicity Reduction Strategies
- Use brightfield where possible — transmitted white light for wound healing, confluency, and cytotoxicity assays has minimal phototoxicity
- Reduce illumination intensity — use the lowest light intensity that gives adequate signal; modern CMOS sensors are sensitive enough for very low light levels
- Increase imaging intervals — imaging every 10 minutes instead of every 1 minute reduces light dose 10-fold
- Use LED light sources — LEDs provide narrowband illumination and lower heat output compared to mercury arc lamps
- Antioxidant media supplements — Trolox, N-acetyl cysteine, and ascorbic acid reduce ROS-mediated phototoxicity
- Consider label-free brightfield methods for assays where molecular specificity is not required
Choosing the Right Live Cell Imaging System
| Assay Type | Imaging Method | Recommended System |
|---|---|---|
| Wound healing / scratch assay | 明场 | In-incubator imager — 24 wells simultaneously |
| Confluency monitoring | 明场 | In-incubator imager — continuous, automated |
| Cytotoxicity screening | 明场 | In-incubator imager — kinetic data per well |
| Spheroid growth | 明场 | In-incubator imager — parallel monitoring |
| GFP/RFP reporter assays | 荧光 | Fluorescence microscope + stage top incubator |
| 3D Z-stack imaging | Confocal/widefield | High-end fluorescence system |
| Single-cell tracking | Fluorescence/phase contrast | High-resolution inverted microscope |
Live Cell Imaging for Wound Healing Assays — Special Considerations
The wound healing assay is the most common application for time-lapse live cell imaging. Creating a defined wound in a confluent monolayer and monitoring closure over 12–48 hours requires consistent environmental conditions throughout — making in-incubator imaging the optimal approach.
The combination of 刮痕制造板 (photochemical wound creation, below 5% CV) with zenCELL owl in-incubator imaging provides a complete standardized workflow: reproducible wound creation at T=0, continuous time-lapse imaging of all 24 wells simultaneously, and automated gap closure analysis — without removing the plate from the incubator at any point.
See live cell imaging inside a real incubator
Free 30-min remote demo — zenCELL owl imaging 24 wells simultaneously. Real cells, real data.
常见问题解答
Do I need a fluorescence microscope for live cell imaging?
No. A brightfield microscope is sufficient for most wound healing assay, confluency monitoring, cytotoxicity, and spheroid growth experiments. A fluorescence microscope is only required when imaging fluorescently labelled cells — GFP/RFP reporters, fluorescent dyes, or immunofluorescence. For brightfield live cell imaging, any inverted microscope with a stable light source is suitable.
How long can cells survive during live cell imaging?
With proper environmental control (37°C, 5% CO₂, humidity), cells can survive and behave normally during multi-day live cell imaging experiments. The limiting factors are typically phototoxicity (for fluorescence), medium evaporation (for open systems), and CO₂ depletion (outside the incubator). In-incubator systems maintain full physiological conditions indefinitely.
What is the best interval for time-lapse microscopy?
For wound healing assays: every 5–30 minutes captures sufficient kinetic detail while minimizing phototoxic exposure. For confluency monitoring: every 30–60 minutes. For spheroid growth: every 1–4 hours. For fast processes like mitosis: every 1–5 minutes. Match the interval to the timescale of the biological process being observed.