Cell Migration · Wound Healing · Scratch Assay
Wound Healing Assay — Complete Guide: Protocol, Methods & Reproducibility
The wound healing assay — also called the scratch assay or gap closure assay — is one of the most widely used methods in cell biology to measure collective cell migration in vitro. This guide covers everything from the basic protocol to the most common sources of variability and how to eliminate them.
What is a Wound Healing Assay?
A wound healing assay is an in vitro method to study collective cell migration — how a sheet of cells responds to a gap and moves to fill it. It is specifically a 2D cell migration approach to semi-quantitatively measure cell migration of a sheet of cells. This is distinct from individual cell chemotaxis (Boyden chamber, Transwell assay) which measures single-cell movement through a membrane.
The assay is used across a wide range of research areas:
- Cancer biology — measuring tumour cell invasion, metastatic potential, and drug effects on migration
- Drug screening — quantifying the effect of compounds on cell motility
- Regenerative medicine — studying tissue repair mechanisms and potential therapeutics
- Wound healing research — modelling re-epithelialisation and keratinocyte migration
Wound Healing Assay Protocol — Step by Step
The standard wound healing assay protocol follows four steps regardless of the wound creation method used:
Seed & Grow
Seed adherent cells at appropriate density. Incubate to ≥95% confluency — typically 16–24 h depending on cell line.
Create Wound
Create a cell-free gap using pipette tip (manual), silicone insert removal, or photochemical light exposure.
Image T=0
Image the wound immediately after creation. This is your reference wound area for all subsequent calculations.
Monitor & Quantify
Image at defined intervals. Calculate wound closure % at each timepoint.
Step 1 — Cell Seeding and Confluency
Seed cells at a density that reaches ≥95% confluency within 16–24 hours. A cell dose curve can be performed in a regular 24-well plate beforehand to find out how many cells are needed to form a monolayer within a certain time. Incomplete confluency leads to variable wound closure rates because non-migrating proliferating cells fill the gap instead of migrating cells.
Critical: Do not move the plate unnecessarily during monolayer formation. Any disturbance causes uneven cell distribution that will affect wound geometry and closure rate.
Step 2 — Wound Creation Methods
The choice of wound creation method is the single most important factor for reproducibility. Three methods are in common use:
| Método | ScratchMaker (Photochemical) | Manual Pipette Scratch | Insert-Based |
|---|---|---|---|
| Wound width CV | <5% | ±30–60% | ±15–25% |
| ECM coating after wounding | Intacto | Physically removed | Blocked beneath insert |
| Physiological wound model | Yes — real cell death | Mechanical rupture | Artificial gap — no cell death |
| Washing step required | No requerido | Recommended | Required (insert removal) |
| 96-well scalable | Yes — fully automated | Impractical | Manual insert handling |
| Microscope required | Any brightfield microscope | Any brightfield microscope | Inverted microscope |
Step 3 — Imaging
Image the wound at T=0 immediately after wound creation. It is important not to overestimate inhibition of migration due to compound toxicity — proliferation assays should run in parallel.
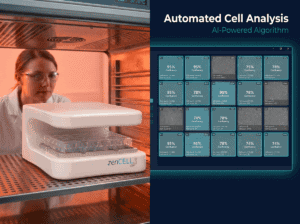
Any brightfield inverted microscope is sufficient for standard wound healing assay imaging. A fluorescence microscope is only required for fluorescently labelled cells. For automated continuous imaging, in-incubator imagers such as the zenCELL owl image all 24 wells simultaneously without removing the plate from the incubator.
Step 4 — Wound Closure Calculation
For manual analysis, use the free Wound Healing Size Tool plugin for ImageJ/Fiji (Suarez-Arnedo et al., PLoS ONE 2020, 900+ citations). For automated analysis, zenCELL owl software calculates gap area, wound closure rate (µm²/h), and t½ gap closure time automatically at every timepoint.
What Cells Can Be Used in a Wound Healing Assay?
| Cell Type | Cell Line | Application | Recommended ECM Coating |
|---|---|---|---|
| Keratinocytes | HaCaT | Skin wound healing, re-epithelialisation | Collagen I or none |
| Endothelial cells | HUVEC, EA.hy926 | Angiogenesis, vascular repair | Fibronectin, Gelatin |
| Breast cancer | MDA-MB-231, MCF-7 | Metastasis, drug screening | Fibronectin, Collagen IV |
| Lung cancer | A549, H1299 | Invasion, EMT studies | Fibronectin |
| Glioblastoma | U87-MG, U251 | Brain tumour migration | Laminin, Fibronectin |
| Fibroblasts | NIH 3T3, primary | Connective tissue repair | Fibronectin, Collagen I |
| Primary neurons | iPSC-derived, DRG | Neurite regeneration | Poly-D-Lysine + Laminin |
The Biggest Problem: Reproducibility
The wound healing assay’s greatest limitation is reproducibility of the wound creation step. Reproducibility is highly dependent on the precision of the researcher, since scratch closure can be affected by the pressure applied and the angle of the pipette tip.
Manual pipette scratching produces wound width variability of ±30–60% CV between wells, operators, and experiments. This means:
- Any drug effect smaller than 30% is statistically invisible — below assay noise
- Inter-experiment comparisons are unreliable — different operators produce different baseline wounds
- Publication requires extensive replication to achieve statistical power
How to Standardize Your Wound Healing Assay
Three approaches improve reproducibility, in order of effectiveness:
- Photochemical wound creation — light mask defines identical wound geometry in every well. CV below 5%. Independent of operator. Compatible with any brightfield microscope.
- Insert-based methods — silicone inserts create a defined gap. Better than manual scratching but insert removal introduces variability and ECM coating is blocked beneath the insert.
- Multichannel pipettes + ruler guides — reduces but does not eliminate manual variability. Still depends on operator pressure and tip angle.
Download: Wound Healing Assay Method Comparison
Free 2-page PDF — where each method fails and how photochemical wound creation solves each problem.
Do I Need a Fluorescence Microscope for a Wound Healing Assay?
Wound Healing Assay vs. Transwell Migration Assay
These two assays are often confused but measure fundamentally different processes:
| Característica | Wound Healing Assay | Transwell / Boyden Chamber |
|---|---|---|
| Migration type | Collective — sheet of cells | Individual — single cells |
| Biological model | Wound re-epithelialisation, collective invasion | Chemotaxis, single-cell invasion |
| Kinetic data | Yes — full time course | No — endpoint only |
| Equipment | Brightfield microscope | Staining + microscope or plate reader |
| Rendimiento | Up to 96 wells (photochemical) | Limited — manual staining and counting |
| Best for | Drug effects on migration, wound healing, re-epithelialisation | Chemotaxis index, invasion through matrix |
How to Automate Your Wound Healing Assay
Manual wound healing assays require removing the plate from the incubator at each timepoint — causing temperature drop, CO₂ loss, and humidity changes that affect cell behaviour. The critical early migration events in the first 2–6 hours are routinely missed.
In-incubator live cell imagers solve this by imaging cells continuously inside the incubator. The zenCELL owl images all 24 wells simultaneously at intervals as short as 1 minute, generating complete wound closure curves without any manual intervention. Gap area, migration rate, and t½ closure time are calculated automatically.
See automated wound healing assay imaging live
Free 30-min remote demo via MS Teams — real cells, real data, your questions answered.
Preguntas Frecuentes
How long does a wound healing assay take?
Typical duration is 12–48 hours depending on cell type and migration speed. Fast-migrating cell lines such as MDA-MB-231 may close wounds in 12–24h. Slower cell types such as primary keratinocytes may require 48–72h. The assay ends when the wound is fully closed or at a defined timepoint.
How do I stop cells from proliferating during the assay?
To ensure wound closure is driven by migration rather than proliferation, treat cells with a proliferation inhibitor such as mitomycin C (10 µg/mL for 2h) before wound creation. This is especially important for assays exceeding 24 hours. Always run parallel proliferation controls.
What concentration of serum should I use during the assay?
Use reduced serum (0.5–1% FBS) or serum-free medium during the migration phase if you want to measure chemotaxis toward a serum gradient. For standard wound closure assays measuring collective migration, normal growth medium (10% FBS) is appropriate.
Can I perform a wound healing assay in a 96-well plate?
Yes — with photochemical wound creation (ScratchMaker plates), 96-well wound healing assays are practical and fully scalable. Manual pipette scratching in 96-well format is impractical due to the number of wells and increased operator variability. Insert-based methods require manual insert handling per well.
What is a good positive control for a wound healing assay?
Common positive controls include TGF-β (stimulates migration), EGF (epidermal growth factor), and scratch-wound conditioned medium. For inhibition assays, cytochalasin D (actin polymerisation inhibitor) is a standard negative control that blocks migration completely.