
Step-by-step protocol, ImageJ analysis, method comparison, data interpretation and how to automate 24 assays simultaneously. Everything in one place.
Book a free demo ScratchMaker system →These three terms describe the same fundamental technique. Understanding the distinctions helps you use the right terminology in publications and select the right method for your research question.
| Term | What it describes | Common context |
|---|---|---|
| Scratch Assay | Physical method: a scratch/gap created in a cell monolayer by a pipette tip, insert removal or device | General lab use, cancer research, drug screening |
| Wound Healing Assay | The biological readout: cells migrate to close the gap, mimicking in vivo wound repair | Regenerative medicine, dermatology, tissue biology |
| Migration Assay | Umbrella term: includes scratch assay, Transwell, Boyden chamber and other methods to quantify cell movement | Publications, grant applications |
| 2D Migration Assay | Specifically the scratch/wound healing assay — as opposed to 3D or Transwell-based methods | When distinguishing from 3D models |
A confluent monolayer of adherent cells is scratched to create a cell-free gap. Cells at the wound edge sense the loss of contact inhibition and begin migrating to close the gap. The rate and completeness of gap closure reflects the collective migratory capacity of the cells — influenced by treatment, genetic modification, growth factors or substrate.
| Method | Best for | Limitations | Cost |
|---|---|---|---|
| Scratch Assay | Collective migration, wound healing models, drug screening, easy setup | Combines migration + proliferation; 2D only | Very low |
| Transwell Migration | Chemotaxis, individual cell migration towards gradient | No real-time imaging, endpoint only, more complex | Medium |
| Boyden Chamber | Invasion through basement membrane (Matrigel-coated), 3D-relevant | Endpoint only, expensive inserts, no kinetics | Higher |
| µ-Slide Insert | Defined gap without mechanical damage to ECM | Requires inserts (cost per assay) | Medium |
This protocol covers manual pipette tip scratch creation. For a standardised, reproducible alternative, see the ScratchMaker system.
Goal: achieve a confluent, healthy monolayer at the time of scratching
Use a well-characterised adherent cell line appropriate for your research question (fibroblasts, epithelial, endothelial, cancer cell lines).
Seed at a density that will reach ~100% confluence within 16–24 hours.
Confirm >95% confluence before creating the scratch. Subconfluent monolayers produce irregular gap edges and unreproducible results.
⚠️ Critical step — do not scratch if confluence <90%Add Mitomycin C (10 µg/mL) 2 hours before scratching to inhibit cell division. This ensures gap closure reflects migration only — not proliferation.
Goal: create a consistent, reproducible gap in the cell monolayer
Using a P200 pipette tip, draw a single straight line across the well in one continuous motion.
Immediately after scratching, gently aspirate medium and wash once with PBS to remove detached cells and debris. Replace with fresh medium (with or without test compound).
Image every well within 15 minutes of scratching. This is your reference wound area for all subsequent calculations.
With zenCELL owl: place the plate, start the software and set imaging interval. T=0 is captured automatically — no manual intervention required from this point.
zenCELL owl: fully automated from hereGoal: capture gap closure over time with sufficient temporal resolution
Remove plate from incubator at each timepoint. Image under inverted brightfield microscope. Return plate to incubator.
Place the 24-well plate inside the incubator on the zenCELL owl. Configure imaging interval and press Start.
Most scratch assays run 12–48 hours. End the assay when control wells reach 80–100% closure, or at a predefined timepoint.
Accurate, reproducible measurement of gap area is the most critical and most variable step in scratch assay data analysis. Here are all methods — from manual to fully automated.
Most common readout. Normalised to T=0 wound area. Directly comparable across experiments.
% closure = (A₀ − Aₜ) / A₀ × 100Average velocity of the cell front. Calculated from wound width reduction over time.
Rate = (Wᵢ − Wf) / (2 × t)Time to 50% wound closure. Useful for comparing treatments with different plateau kinetics.
From confluence curve in zenCELL owl softwareThe most widely used free tool for scratch assay analysis is the Wound Healing Size Tool plugin for ImageJ/Fiji (Suarez-Arnedo et al., PLoS ONE 2020 — cited 979×). Here is how to use it:
Download Fiji (recommended — includes ImageJ with many plugins pre-installed) from fiji.sc. Free, open-source, runs on Windows, Mac and Linux.
Download Wound_healing_size_tool_updated.zip from the plugin repository. Unzip and place the .ijm file into the Fiji.app/plugins/ folder. Restart Fiji.
For a timelapse: File → Import → Image Sequence → select your folder. For single timepoints: File → Open. Convert to 8-bit greyscale if not already: Image → Type → 8-bit.
Image → Type → 8-bitGo to Analyze → Set Scale. Enter the known distance in pixels and the real-world measurement (e.g. µm per pixel from your microscope). This converts pixel measurements to µm for migration rate calculation.
Analyze → Set Scale → pixels/µmPlugins → Wound_healing_size_tool. The plugin automatically detects the wound boundary using pixel intensity variance. Parameters to adjust if needed:
Results window shows: wound area (µm²), wound width average (µm), wound coverage %, width standard deviation. Export as CSV for GraphPad Prism, Excel or R.
Results → File → Save as → .csvIn Excel or GraphPad: divide wound area at each timepoint by T=0 area, subtract from 1, multiply by 100. Plot as % wound closure vs. time. Compare treatment vs. control.
% closure = (1 − Aₜ/A₀) × 100MRI Wound Healing Tool (Montpellier Resources Imagerie) — coherency-based analysis for cell orientation. | CSMA plugin (2025, IEEE Access) — improved wound edge detection for cells migrating into the wound centre. | TScratch — MATLAB-based, good for batch processing. | CellProfiler — pipeline-based, steeper learning curve but highly customisable.
The faster alternative to ImageJ: zenCELL owl built-in analysis.
zenCELL owl software automatically calculates confluence per well at every timepoint — directly from brightfield images captured inside the incubator. Gap area, migration rate and t½ gap closure are generated automatically without any post-processing in ImageJ. Export CSV data directly to GraphPad or Excel. 24 wells analysed in parallel, retrospectively reviewable for any timepoint. No manual plugin installation, no parameter tuning, no batch processing.
Cause: Manual pipette tip variation — operator, angle, pressure.
Fix: Use a ruler guide, consistent operator, or the ScratchMaker stencil system for <5% width variation.
Too fast: Reduce serum concentration, add Mitomycin C, use a wider scratch tool.
Too slow: Increase serum, check cell health, ensure 100% confluency before scratching.
Cause: Too much pressure with pipette tip, subconfluent monolayer.
Fix: Use lighter pressure, ensure full confluence, coat plate with fibronectin or collagen.
Fix: Add Mitomycin C (10 µg/mL) 2h before scratching to block cell division. Alternatively, use zenCELL owl to track confluence increase in non-scratched reference wells in parallel.
Fix: Convert to 8-bit greyscale, increase image contrast before analysis (Image → Adjust → Brightness/Contrast), try different threshold parameter in the plugin.
Cause: Variable scratch width, different operators, manual timepoint sampling.
Fix: ScratchMaker for consistent gaps + zenCELL owl for automated continuous imaging = full reproducibility.
The zenCELL owl eliminates every manual step after scratching. Place the plate, start the software, walk away. Full kinetics, all wells, automatically.
| What | Manual / conventional | With zenCELL owl |
|---|---|---|
| Imaging intervals | Every 4–8h — missing kinetics between | Every 5 min — complete kinetics captured |
| Conditions in parallel | 1–6 wells (limited by operator time) | 24 wells simultaneously, same incubator |
| Incubator disruption | Every timepoint — temperature drop, CO₂ loss | Zero — device stays inside |
| Gap closure analysis | Manual ImageJ per image — hours of work | Automatic per well at every timepoint |
| Data export | Manual CSV after ImageJ | Direct CSV, PNG, AVI export |
| Operator dependency | High — imaging skill, consistent position | Zero — same position every time, automated |
| Cost per experiment | Low | Low — no consumables added |
The zenCELL owl costs €14,000 — one-time, no annual fee. For labs running 2+ scratch assays per week, that equates to less than €3 per assay over 2 years, with complete kinetic data and no operator time spent at the microscope.
The terms are often used interchangeably. "Wound healing assay" specifically refers to the biological process being modelled (collective cell migration to close a wound), while "migration assay" is broader and can include Transwell, Boyden chamber and other methods. In practice, if a scratch is created in a monolayer and gap closure is measured, both terms are correct.
Use the free Wound Healing Size Tool plugin (Suarez-Arnedo et al., PLoS ONE 2020). Install it via Plugins → Install, open your image in 8-bit greyscale, run the plugin, and export results as CSV. It calculates wound area, wound width, and wound coverage automatically. See the full ImageJ guide above for step-by-step instructions.
Use moderate, consistent pressure with the pipette tip. Ensure cells are fully confluent before scratching (>95%). If ECM is important, coat wells with fibronectin (1 µg/cm²) or collagen I before seeding. Wash debris gently with PBS immediately after scratching to remove dead cells.
It depends on your assay duration and cell line. For assays <12h with slow-proliferating cells, proliferation contribution is minimal. For longer assays or fast-cycling cell lines, add Mitomycin C (10 µg/mL, 2h pre-treatment) to ensure gap closure reflects migration only. Some groups run parallel wells with and without Mitomycin C to quantify each component separately.
With zenCELL owl: 5–30 minutes is typical for scratch assays. Faster migrating cells (e.g. HeLa, MCF-7) benefit from 5–10 minute intervals to capture the complete kinetics. Slower cells can be imaged every 30 minutes. The zenCELL owl records all images automatically — you can always review retrospectively.
The scratch assay measures collective 2D cell migration — cells move as a sheet into the gap. Transwell assays measure individual cell chemotaxis — single cells migrate through a membrane pore toward a gradient. Scratch assays are simpler, cheaper and provide kinetic data. Transwell assays are better for studying chemotaxis, invasion (with Matrigel coating) and single-cell motility.
Yes. zenCELL owl software automatically calculates confluence per well at every imaging timepoint. This directly translates to gap closure rate and t½ closure time without any post-processing in ImageJ. Data exports as CSV for GraphPad Prism or Excel. The full timelapse is also available as AVI video — publication-ready without additional processing. Book a free demo to see it live →
Epithelial and endothelial: HaCaT (human keratinocytes), HUVEC, Caco-2, A549. Cancer: MDA-MB-231, MCF-7, HeLa, PC-3, HT-29. Fibroblasts: L929, NIH-3T3, primary human dermal fibroblasts. Choose based on your research question — cancer invasion studies typically use mesenchymal-like cells; wound healing models use epithelial cells.
See zenCELL owl perform a live scratch assay in a real incubator. Free 30-minute demo, twice per week.
Book your free demo ScratchMaker system → English English
 Deutsch
 Français
 Español
 简体中文 English English Deutsch Français Español 简体中文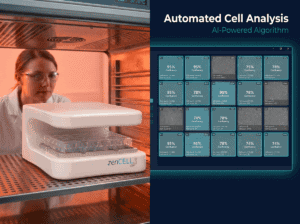
Watch zenCELL owl image live inside an incubator. Available.